First Home Fabulous: How this DIYer transformed her boring bathroom
Watch Carly Anne’s Kenneally’s renovating journey in our six-part series, First Home Fabulous.
Carly Anne shares the trials and tribulations of her first-home buying and renovating experience, with a little help from her mum – interior designer and The Block Judge Shaynna Blaze.
A few years back, Mum and I found ourselves at Haymarket in Stockholm, a once-grand department store turned art deco hotel, famously where Greta Garbo was discovered.
The cafe, named Greta’s, is a glorious pink and gold haven, and I swore that one day, I’d have a bathroom that would rival its beauty.
Fast forward to now, and after being slapped with a $12,000 hospital bill (don’t worry, I’ve since acquired health insurance – lesson learned), I had to put that dream bathroom on hold. Or so I thought.
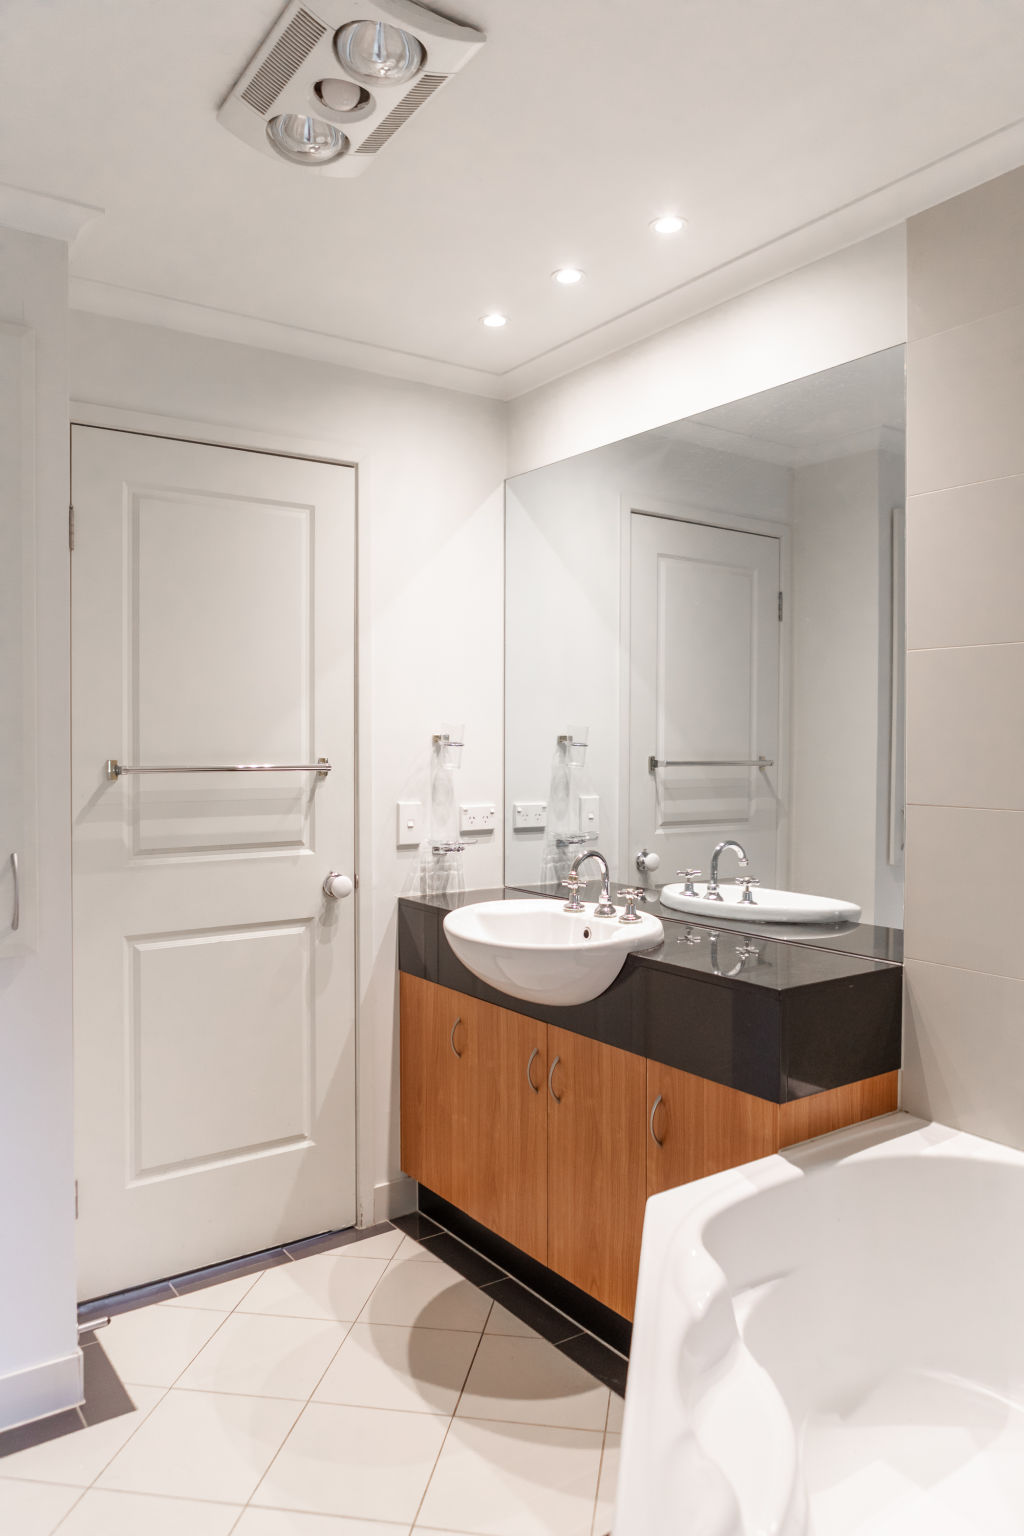
Where there’s a budget, there’s creativity, and thanks to the endless rabbit hole of TikTok DIYers, I discovered the magical world of painted tiles. Paint, I could afford; waterproofing, not so much.
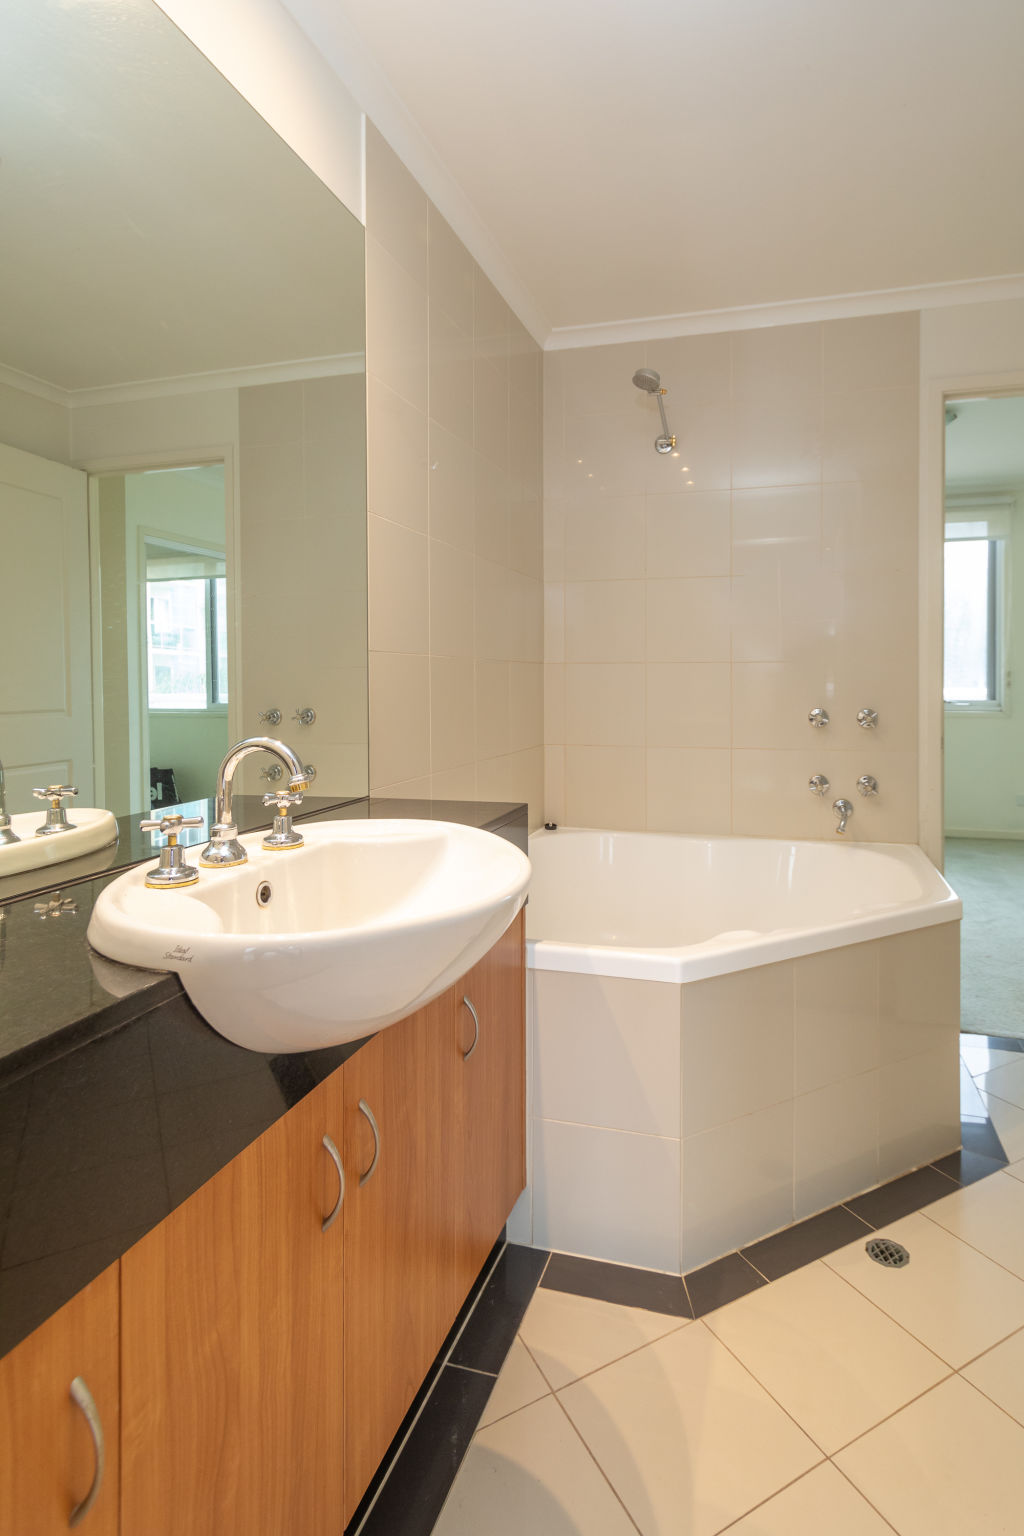
The bones of the bathroom were promising. There was the corner bath that screamed character, solid cabinets, a generously sized linen cupboard, and a black granite benchtop with black tile accents circumferencing the room – perfect nods to the art deco style I love.
The plan? Swap out the hardware; keep the benchtop, cabinets, and less-than-glamorous sink; and paint everything else. You can’t win them all, right?
Mum, ever the fountain of ideas, sent me videos of people creating terrazzo looks using paint and chips – a brilliant way to tie in my plan for the kitchen to the bathroom.
Now, here’s the thing: I’m not exactly what you’d call an artist. I’ve got the enthusiasm, but my execution is, let’s say, a bit rustic. So, I knew this project had the potential to scream “homemade” if I wasn’t careful.
I had some old tiles from a project I’d done with Mum in Kyneton, so I did a few test runs. My vision was a terrazzo with predominantly gold chips and varying shades of pink for texture.
The paint oxidised the gold slightly, giving it a greenish tinge, which I didn’t love but didn’t hate either. It wasn’t perfect, but it wasn’t a total fail, so I decided to go for it.
The first terrazzo application was all gold leaf, and while I liked it, my friends and family weren’t convinced. I tried again, painting each tile with clear gloss and carefully sprinkling terrazzo chips and gold leaf to make each one unique.
By the end of it, I was thrilled – it looked incredible, and I was so proud of myself for taking the plunge.
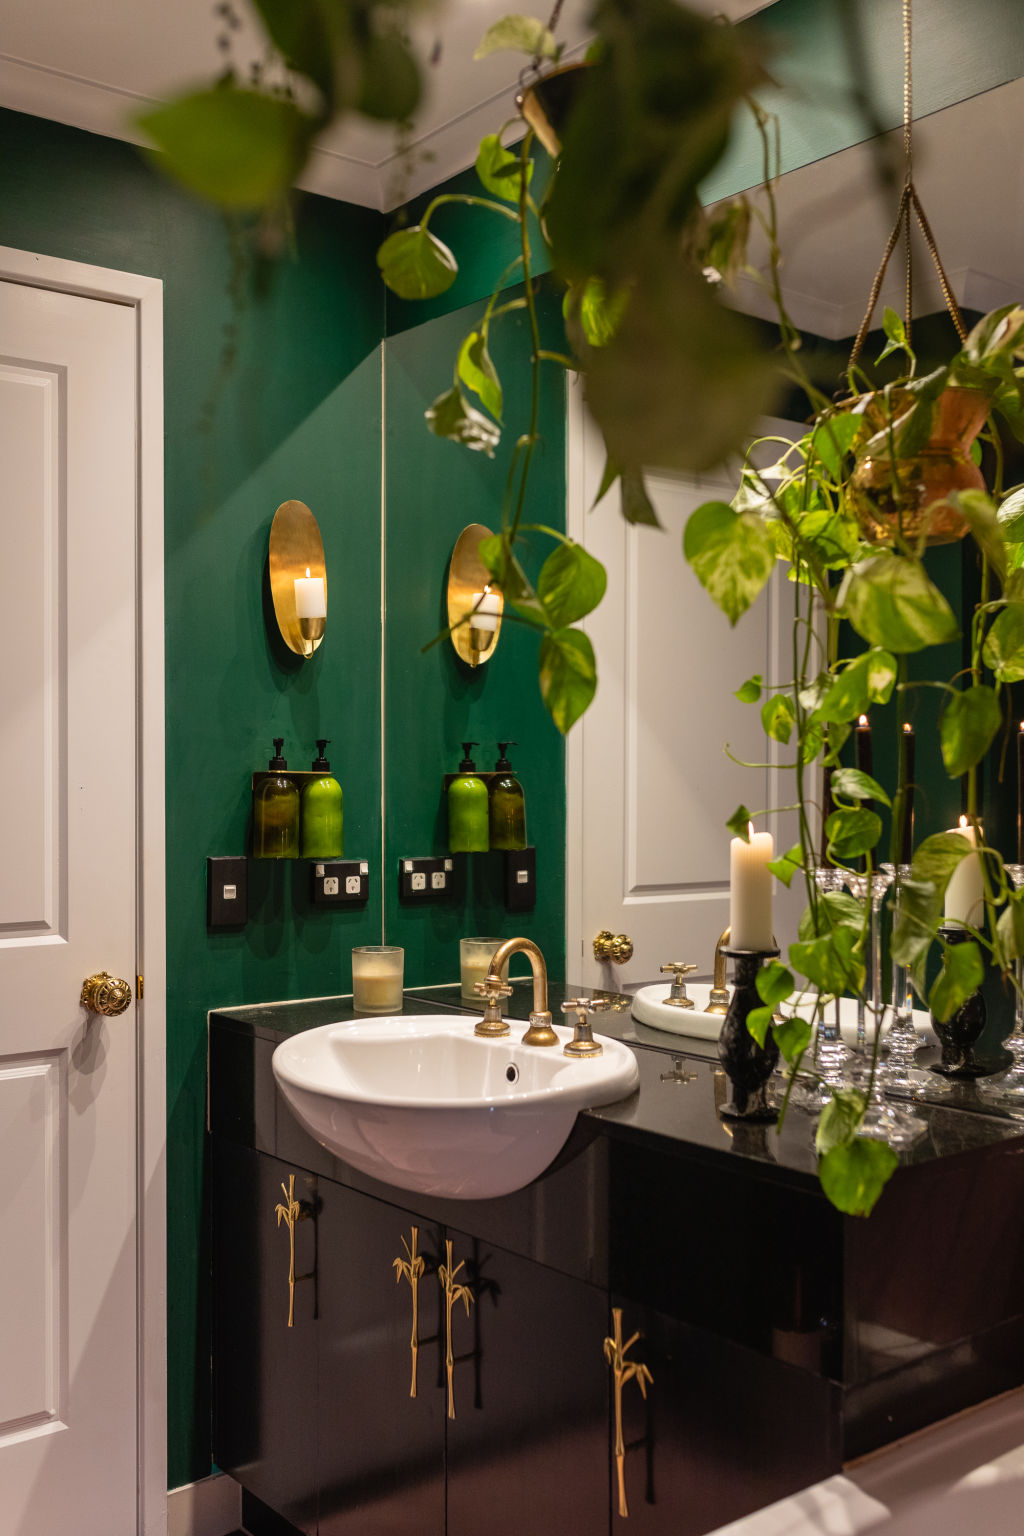
Next were the doors. I sanded them down but skipped the primer – rookie mistake. If you don’t prime shiny surfaces, the paint peels off like cheap nail polish. After a messy round of stripping the paint with heavy-duty chemicals, I sanded, primed, and repainted them black.
They looked stunning, especially with the gorgeous bamboo handles I’d sourced that tie in with the ones I added in the hallway. Even though this tiny apartment blends a range of eras and styles, I managed to incorporate elements that create a cohesive look throughout.
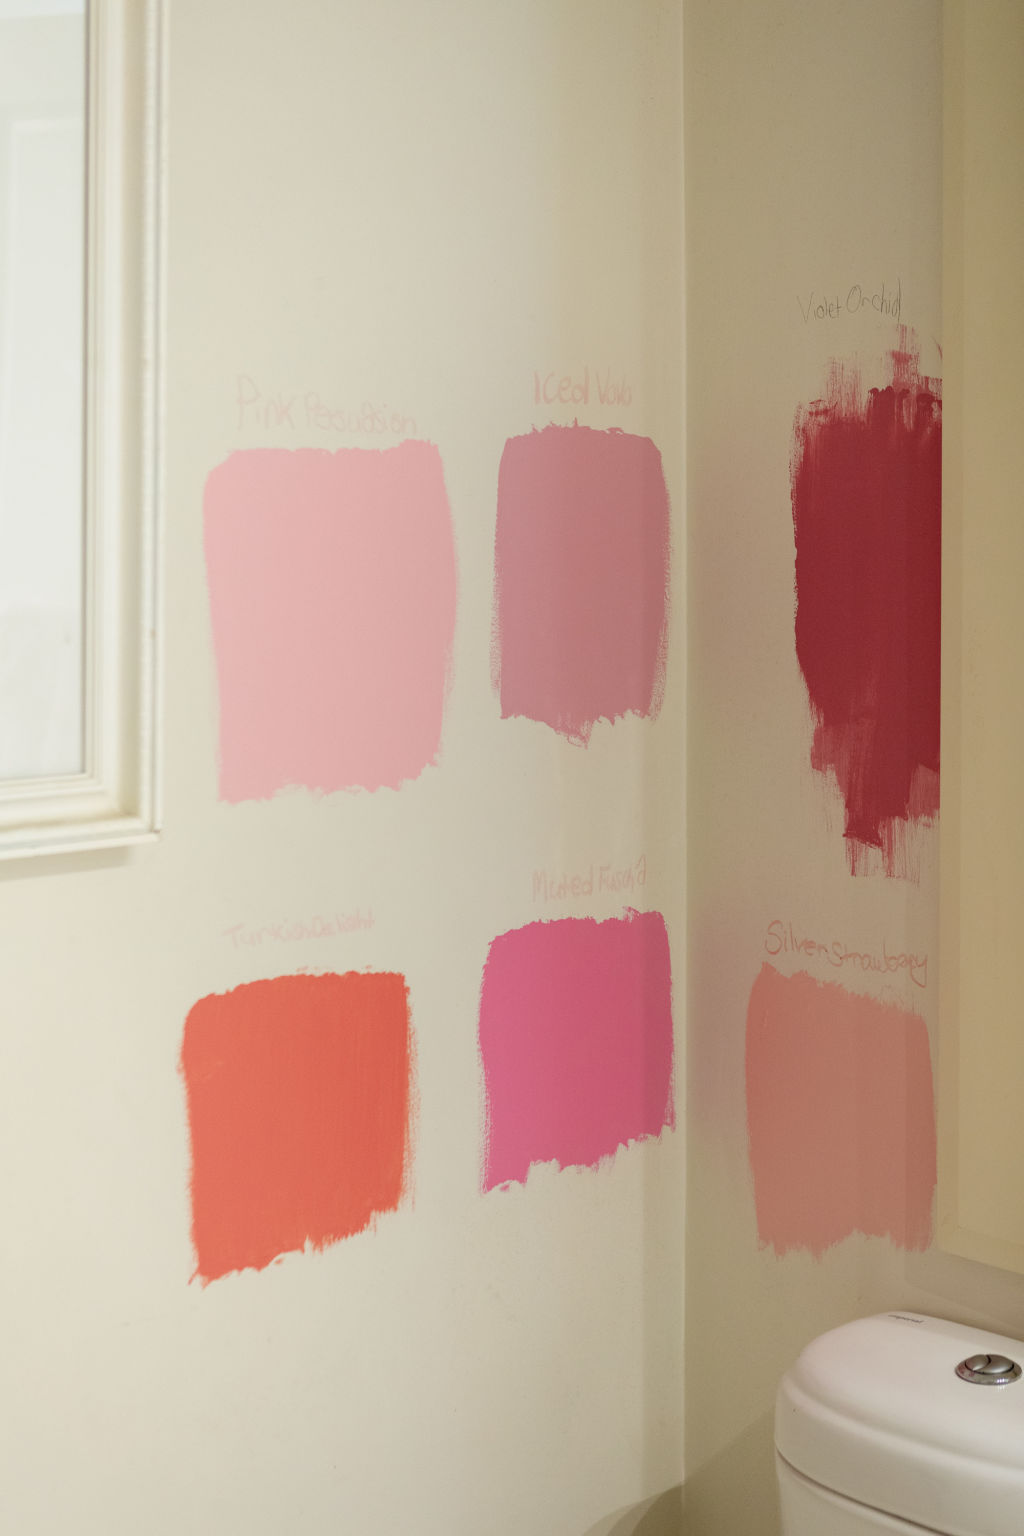
Now, let’s talk colour. Deep emerald green is my kryptonite – sexy, bold, and very art deco. I initially wanted it for a couch, but when that didn’t work out, the bathroom wall seemed like the perfect spot. I had envisioned a cool, rendered look, so I picked up a few swatches and made my choice.
Mum suggested starting with the small wall behind the door, thankfully, because it looked awful. It was giving off major ’90s vinyl desk vibes. Thirty minutes in, we called it quits and went back to basics. I picked up the emerald green paint and did a simple, classic wall instead.
Just a week later, I saw Darren Palmer’s Instagram, where he nailed the look I was going for in a different shade. Turns out I had the right brand, just the wrong product! Frustrating, yes, but honestly, I love the wall as it is, so … no regrets.
This bathroom is now everything I dreamed of and more. What started as a closed door on a budget-busting renovation turned into the most dramatic transformation of the whole apartment.
Friday night bubble baths are now a regular indulgence, with room for two, making this space more than functional – it’s a little slice of luxury.

Three tips for your next bathroom makeover
- Can you get away with an uplift rather than a complete makeover? If you are struggling with budget constraints, get creative! There will be ways to achieve the look you’ve got in mind, with fixes to tide you over.
- Always do a test if you’re thinking of doing something a little different. Whether it’s a rendered wall or a gold leaf terrazzo tile, seeing how something looks before you commit can make all the difference.
- Prime shiny surfaces. Save yourself the heavy chemicals that you’ll need to remove the paint and start again – you’ll also avoid the horror of seeing your careful layers of paint peeling away, bringing you back to square one.
Up next in our six-part series First Home Fabulous, Carly Anne tackles the kitchen – and it’s incredible.
We recommend
We thought you might like
States
Capital Cities
Capital Cities - Rentals
Popular Areas
Allhomes
More
