How to take your own professional-looking property listing photos

Abby asks: “How can I take professional-looking photos of my property?”
Jane says: One of the best ways to attract buyers and tenants is to display some great photos showing off the best aspects of your property. Many sellers rely on shots taken by real estate agents, but there is a growing trend amongst home owners to present their property from a more personal perspective. The following tips outline how to do this while keeping the finished product to a professional standard.
Don’t use your phone. Professional photographers use specialist equipment, and whether you own, buy or borrow a camera for the job, it will be worthwhile.
Make sure that the property is clean and presentable. You don’t want to be taking great photos of a mess. Get rid of clutter, arrange furniture stylishly, make sure surfaces are gleaming, and ensure the garden and yard look trimmed and terrific. Clean lines and homeliness appeal to tenants and buyers. If you’re not sure about interior arrangements, consult an interior designer or home stager.
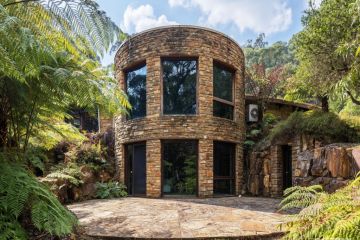
Create a focal point, whether the photos are of the interior or exterior of the property. You don’t have to show an entire room in one crammed photo. Draw the viewer’s attention to a great feature such as a barbecue area, blossoming tree, stonework feature, blazing fireplace or bathroom mosaic.
Try composing shots that display balance and/or symmetry. Remove furniture items that make the view look crowded or busy.
Try experimenting with taking shots from a different angle of each room, and from a different height. Plan each shot, and take lots! You can always delete the duds later, but there will be some standouts worth saving.
To fit most of a room in the shot, consider using a wide angle lens, but be careful of distortion. Use depth of field and a tripod to prevent blurriness. A professional photo of your home will show the small details in focus.
Study shots of other properties, even just real estate photos, and see what you like about them. Work out the views of a house’s facade that do work and those that don’t. Remember this while you’re planning your own shots.
Light it up! You can use natural light to suggest warmth, airiness and brightness. This will vary depending on the room you are photographing. If there is a lack of natural light, consider using artificial light and/or filters, plus any lighting available in the room – you don’t want any gloomy corners or shadowed areas. When photographing outside, choose the time of day carefully, avoiding periods of glaring light and shooting towards the sun.
Don’t be afraid to touch up with photo editing software. The changes you make should be cosmetic only – you don’t want to mislead potential buyers or tenants in any way. Experiment with cropping and lighting and generally “clean up” the shot. Professional photographers do this, so you can too!
Remember, a picture is usually the first thing that buyers or tenants see of your property. Making it a spectacular picture can make all the difference between the viewer ignoring your ad or picking up the phone to arrange and inspection.
Jane Eyles-Bennett is an Interior Designer & Renovation Consultant. She’s the creator and driving force behind Hotspace Consultants and has consulted on over 550 property renovations.
We recommend
We thought you might like
States
Capital Cities
Capital Cities - Rentals
Popular Areas
Allhomes
More
- © 2025, CoStar Group Inc.
